
I think we will be done before winter gets here. I THINK, being the operative word here.
If you don't remember or have just started following me, I entered THIS contest and an airplane wing desk was something we really wanted help with.
Watch my entry video HERE if you would like to learn more on the back story of the Airplane wing.
Bottom line, I didn't win. I am OK, we are moving forward.
I bought an airplane wing for $125.00 from a place called, Preferred Airparts. This is not something they usually stock, but they just so happened to have an unusable wing off a small Piper plane.
Below is our inspiration for this project, Restoration Hardware 's Aviator Desk that retails for $2195.00.
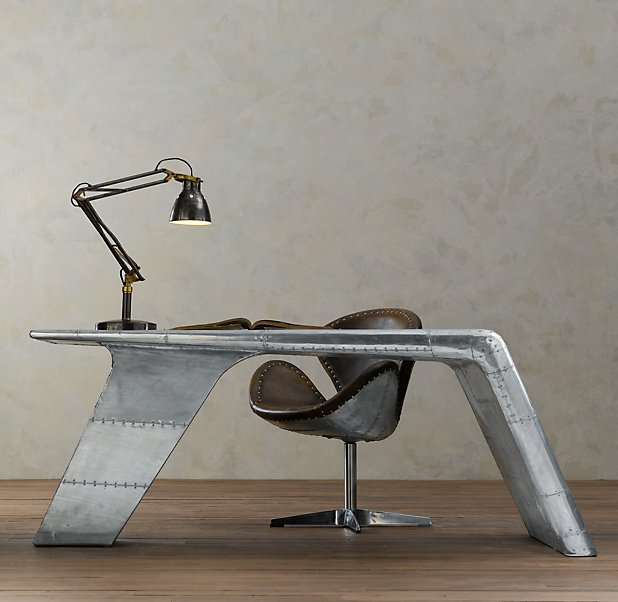
Here is what ours looks like....
.JPG)
Not exactly the same thing.... but it is still super cool.
.JPG)
From these pictures you can see that it's huge.
See that "worn spot" on the part that sticks out? We were testing our paint stripper to see how the metal looks underneath and to see if we have the right product. We used a brand called "Klean-Strip"paint stripper, it was just what we had on hand. It worked but the paint is tough!
Bottom line, the aluminum is pretty but stripping the wing will be a giant task (not to mention buffing the thing). We will get a nice metallic look. It has now been out there for 2 months like this and the spot has only darkened a little.
Note: This is aircraft grade aluminum resistant to weathering/corrosion (obviously). Not all metals/aluminum will act this way and we suggest you do not leave it outside if you are trying to recreate this. We will still need to seal the metal once stripped completely. More on this when we start to strip the entire thing.
Here was my initial concept for the desk:

I like to make these pictures to clearly explain what I am seeing in my head ("the plan") to my husband. He likes visuals.
Visuals are plus if you have a blog :-)
My first thought was to cut it in half and use one cut piece as the table top and the other cut piece as a leg support like in the Restoration Hardware one. The other side would have to be supported by legs instead of a shelf (too hard and time consuming for an already difficult project)
I would like the wing desk to look like this:

We are not sold on this concept, we may use 4 legs instead of Piece #2, as support. What do you think?
Okay so now for the progress:
Our #1 issue has been, HOW TO CUT IT DOWN TO SIZE?!
There are supports in the interior that run vertically in both directions. These apparently are called "ribs". Makes sense right? I learned that from Nick. It has been a huge help that I am married to an Aerospace Engineer. He knows a lot about airplane wings!
Here are the supplies that we started with. I will try and put things we had to purchase in RED. That way we can track the total cost of this thing!

I forgot to add our craftsman multi-tool (already owned) for the picture, it looks like this:

Hope you are still reading because HERE WE GO, here is the progress we have made. It is in tutorial format but we are still learning as we go and wanted you to be involved "real time" and learn with us. I will do a summary of "best practices" at the end.
WHAT YOU ALL HAVE BEEN WAITING FOR.....
DUN
DUNN
DUNNNN
STEP 1. PROTECT YOURSELF
We did not want to be breathing in metal shavings.
We also have never cut metal before, so protect eyes and hands, check!

Pearls are optional.
STEP 2. Use the stud finder to find the ribs. We were lucky to have a hole to see into. Then use your laser on the laser level to find a straight line. Use duct tape to tape off that line.
.JPG)
STEP 3. Tape off a second line, like the first, leaving room for your blade to cut down the line. This will help you to cut straight.
.JPG)
STEP 4. Put a blade into your jigsaw according to the instructions, the blade needs to be for cutting aluminum/ metal.
Then START CUTTING
HOLY *($%(*)@$^@$)(&@$ THIS WAS SCARY AT FIRST but the jig cut like butter like this YOUTUBE GUY SAID! Awesome. You just have to go really slow and let the tool do the work.
.JPG)
.JPG)
Where are your gloves mister?!
STEP 5. GET STUCK and START FROM THE OTHER SIDE...
We got stuck and could only go so far with the jig. It looked like it was hitting something internally and was jumping up. Then we broke a blade.
We got frustrated and started from the other side:
.JPG)
This worked until we got stuck again! We got frustrated and decided to give it a rest until the next weekend. We took the week to do some more research
STEP 6. ENTER THE BEST THING EVER: TITANIUM BLADE
We remembered we had the Craftsman multi-tool the following weekend and we went out to find a blade for it.
We bought this Bosch Titanium Blade: for $22

and an adapter piece $8 (VERY IMPORTANT TO READ THE PACKAGING FOR COMPATIBILITY). Thankfully we saw the asterisk * on the packaging, indicating we needed an adapter for Bosch to work with Craftsman:

STEP 7. We then started to cut again with the multi-tool. We were able to make a clean cut through the skin (official name for the aluminum) all the way around the wing in two spots. The Craftsman worked great, the teeth barely wore down at all, she's hardcore. We did have to pause to recharge the battery. Other than that, we did not have problems cutting the skin.

** Notice there are now two taped sections, we decided to cut along another rib as well.
The problem now: how to cut through some very difficult vertical structures on the interior?
We made two cuts that will now allow us to take off the skin in squares between the two cuts. The vertical structures run perpendicular to the cuts we are making (vice parallel like the ribs).

Hopefully we will be inside this thing and able to cut it in half by next week.
_________________________________________________________________________________
PAUSE: Ikea trip for frames ENTER: the clearance section.
Two perfect chrome legs $2.99 ea
.JPG)

Even if they don't work it won't be a big loss. They are adjustable in height and have angled attachments.
Good news is they have more/similar legs at cost, however, they are $30, so I hope I don't have to buy more.

TOTAL COST SO FAR: $ 218.98
Stay tuned for Part 2 in the coming weeks!
Wish us luck.
-Christina
love it! I can't wait to see what it looks like when it is finished. SO crafty! Awesome job persevering so far! :) love!
ReplyDelete